
Introduction
What is NeuroVecta?
Getting Started
Logging In
Quick Create UI
Sidebar Menu
Working with Files
Vector Databases
Uploading Files
Indexing Files
Querying Documents
Citation Rationales
FAQs
Contact

Quick Create UI
The fastest way to get started with NeuroVecta
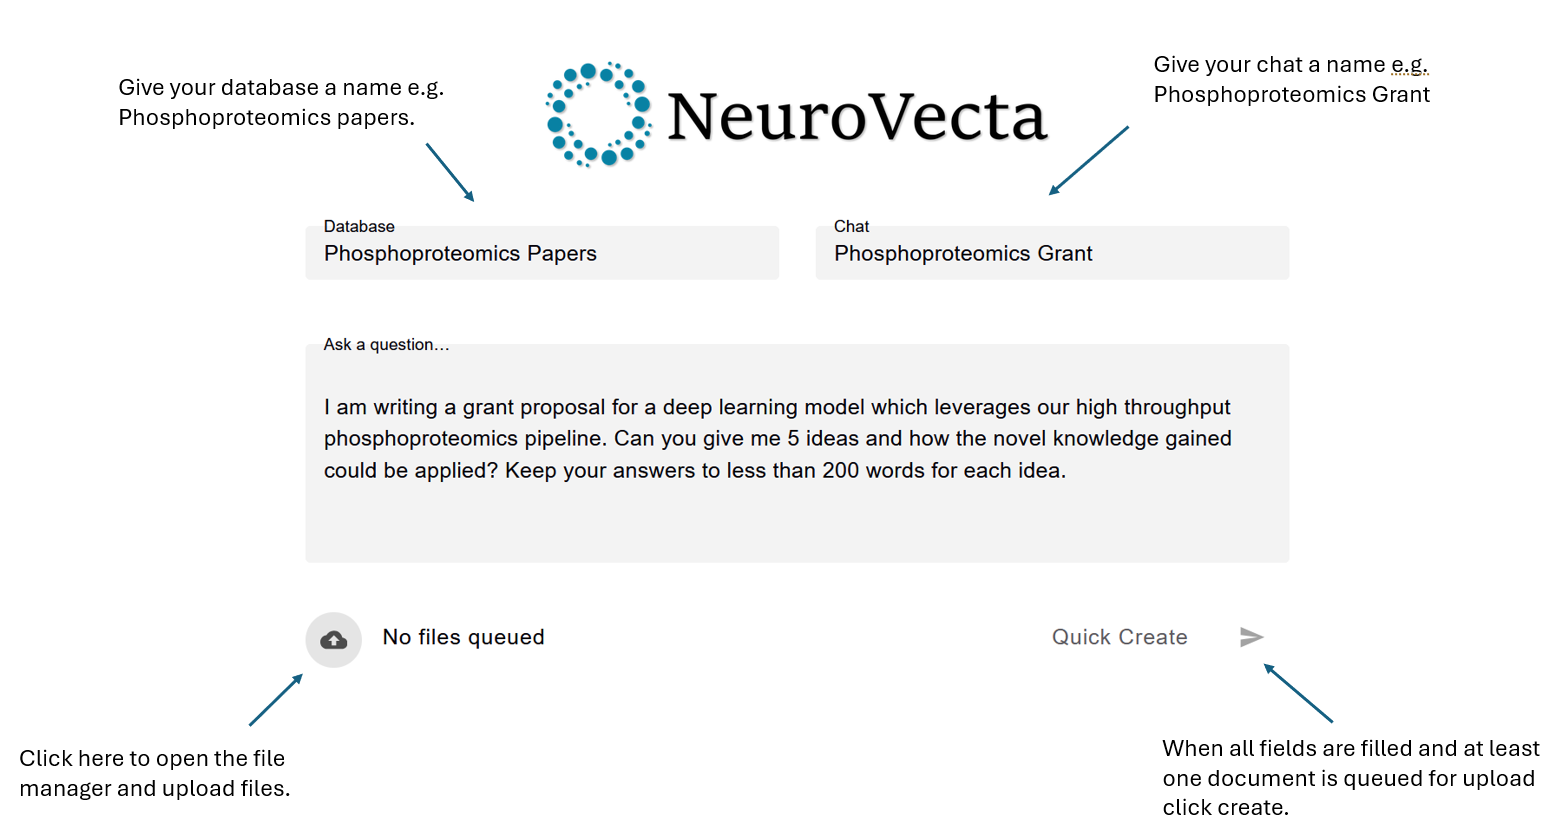
The Quick Create interface streamlines the process of getting started with NeuroVecta by automatically creating a database, initiating a chat session, and uploading documents in a single, seamless workflow.
What Quick Create Does
Automatically creates a database
No need to manually set up a database first - Quick Create handles this for you.
Initiates a chat session
A new chat session is automatically started so you can begin querying immediately.
Uploads documents
You can upload your files right away, all in one streamlined process.
Using Quick Create
Step 1: Enter Database Name
Give your database a descriptive name that reflects the content you'll be uploading (e.g., "Research Papers Q4 2024" or "Product Documentation v2").
Step 2: Upload Your Files
Select the documents you want to add to your database. You can upload multiple files at once. Supported formats include PDF and Word (.docx) files.
Step 3: Start Querying
Submit your query and once your files are indexed, NeuroVecta will generate a response.
Alternative Approach
All functionality accessed via Quick Create can be found in the sidebar menu. If you prefer more control over the process, you can create databases and chat sessions manually using the sidebar options.
Recommended for Beginners
Quick Create is the fastest way to get started with NeuroVecta, especially if you're new to the platform. Once you're comfortable, you can explore more advanced features through the sidebar menu.